Unless you are a certified Montessori teacher taking a few sabbatical years, your first year of home schooling your child using the Montessori method can be a bit overwhelming. Despite all the research, planning, and reading, it's always a bit difficult to target what's really essential in a home school setting. You actually don't NEED that much, but some people choose to have it all. It's a bit like Montessori materials purchases; You CAN buy Nienhuis quality OR you can buy any other quality: You don't NEED Nienhuis quality in a home setting as only 1-2 children will handle the materials for a only a few years but you CAN choose to buy it if you want it...Below, I've listed my personal Top 10 Essentials for home schooling my toddler the Montessori way...
 |
| 1. Montessori Albums |
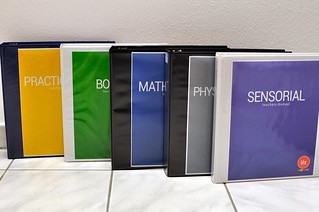
If you plan on starting to homeschool your children, you will need direction; some kind of a curriculum. If you chose to homeschool with the Montessori method, your curriculum will be found in "albums" in which the scope (objective to be achieved) and sequence (order of presentation) will be presented for several, but not all, "activities". Several albums are available for purchase and each is different. I have bought some from both
Montessori Print Shop and
KHT Montessori and would recommend both types. I've also gathered a lot from
Montessori at Home, although it is not technically an album but more of an e-book with a lot of information on various aspects of the curriculum.
 |
| 2. An assortment of trays |
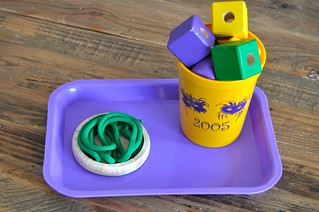
Be they made of wood, acrylic or plastic, these will be needed in various sizes. It's always fun to have an assortment of colors as well to match the theme/materials being presented (see how I matched my Mardi Gras threading task with my tray above?). The trays should be light/small enough for your child to carry them around but they should also be sturdy enough not to break under the weight of the materials placed upon them. So far, I've had very good luck with Montessori Services's medium plastic trays (medium-size plastic tray shown above in picture in purple) and I just placed a new order for more colors and sizes for this year. Overall, you'll need a few trays as several will be on the shelves at the same time.
3. A Work Rug or a Low Table
Ah the work rug...It is awfully cute to see children working on their own personal rug in Montessori schools. I've been debating for years within myself whether I should have used one with Adrian or not. Truth is : in New York, we did not really have room for a work rug on the floor. All truth really be told: Adrian never had to fear anyone would walk on/over his work space either as we always did school when his sister was napping (still do actually). You see, I've never been convinced a work mat was needed in a home school setting so I never used one (couldn't anyway). It never caused any harm either as we had a small low table to define Adrian's work space. As such, school materials were "contained". For this upcoming school year though, I'll be dealing with a new little person: Zahavah. The small low table is gone and so is the small family room. Suddenly, the work mat does not seem like a bad idea...Or does it? The debate continues...
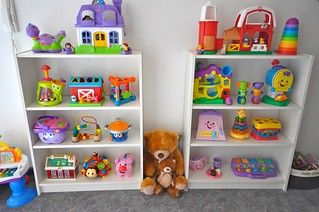 |
| 4. Low Shelving |
Prior to starting your day, your trays should be set our and ready for presentation on shelves. Ideally, an entire room in your home will have been set aside for homeschooling and several shelves will have been put up (one for practical life activities, one for math, one for language, etc.) but life is, let's face it, not always ideal. Most of us simply cannot set aside an entire room for a school room in which case your shelves can be put up in the corner of your "school room". Some people even have "roll away shelves". When I first started with Adrian (barely 3 year old at the time), I used our cramped family room as our school room and had no shelves at all. I used the fireplace's low step as a shelf and only set out enough trays for that day on that step. Once school was over, they were taken away. Of course, it was more work for me and it didn't allow him as much freedom in his choice of work but he always ended up choosing everything set out anyway...Oh, one last thing, if you are planning on investing in shelves, choose low ones (easy access for children) that are not too deep and preferably ones with an option to lower/raise the shelves as needed. I like
IKEA's Billy Shelf. We bought four and I find them to be the perfect height, width and like that the inner shelves can be raised and lowered easily. Extra shelves can also be bought. The very top is of course out of reach for the children but that is not a bad thing; materials like huge puzzle maps and cabinets can be put up there. Please note that the picture above shows our shelves in action in the "Play Room" a year ago. As such, they are not displaying school trays but rather...toys! :)
 |
| 5. A Color Printer, lots of paper, card stock and an optional laminator |
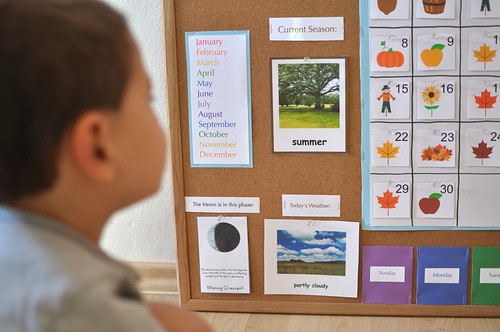
The Montessori approach is very hands-on but there are many times when three part cards and other printed materials will still be used
(shown above : Earth's Most Beautiful Places in a 2 Part Card format). As such, a good printer with lots of card stock will be needed for those moments. I don't have a top of the line inkjet printer but it does a pretty good job overall. I've also invested into a laminator over the Spring. I hesitated long and large before doing so because Adrian has always taken such good care of my materials and since I only have two kids, I feel like it's more or less needed. My daughter is a bit more rough with materials though (she is younger...) and I do think the presentation is neater with the laminator so from time to time, I'll use my laminator but I really do not think it's a necessity if you homeschool.
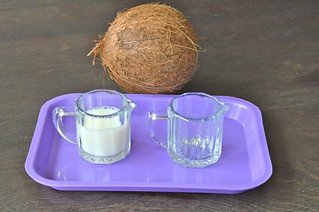 |
| 6. Small baskets, boxes, bowls, pitchers |
With all the pouring and transferring done this year, pitchers, decanters, small glasses with handles, and no handles will be needed for sure. Small baskets and bowls and boxes will also be needed to hold the items put on the trays of course. All of these things can be found in craft stores and bargain stores, thrift stores, flea markets and the like but
Montessori Services also has a nice variety if all you find in your locality is not suitable or expensive (above: Montessori Services' creamers on one of their medium size trays). I recently replenished my pitcher and basket assortment in order to have more variety and found the prices quite reasonable.
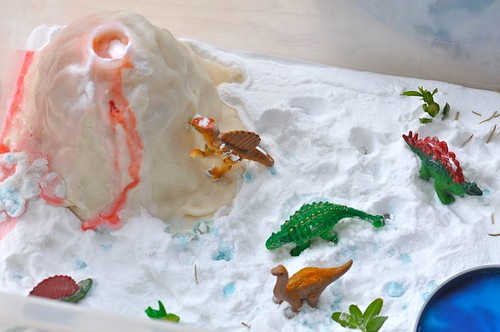 |
| 7. Small themed objects |
If you intend to use thematic studies during the year, (I use them year-long), small objects associated with that theme should be collected. For example, for our "fall" theme, I've already started collecting acorn caps and pinecones that fell recently. If you are heading to the seaside this summer and plan on studying "the beach" later this year, bring back some seashells, sea glass, and such. You'll quickly discover that the bargain stores such your local "Dollar store" / Euro shop, thrift store, yard sale, and flea markets are some of the best places to look for small, cheap themed items; especially seasonal ones. (Craft stores are also excellent resources). (Pictured above are some dinosaurs from Safari Ltd.'s Dinosaur Toob. These were part of of dinosaur week last year.)
 |
| 8. Montessori Materials |
Homemade or store-bought, a few Montessori materials will be needed during your toddler's first year of Montessori school. Which ones? It all depends on your toddler's rhythm. Some children are fast learners and some like to repeat activities for a longer time before moving on to the next. One thing is sure, the first year is a lot more about Sensorial and Practical Life work so set some money/time aside for a Pink Tower and a set of Brown Stairs at the very least. Number rods and Sandpaper numbers for math will probably also be presented. As for the rest, like I said, it will depend on your child but color tablets set 1 and probably 2 will probably be presented along with some fabrics...
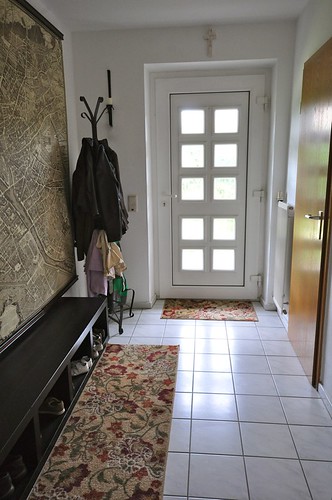 |
| 9. Child-Size Equipment / Child-Friendly Environment |
Nothing will make life easier for your child than having child-size equipment. Children want to learn to become independent and can do quite a great deal if we show them how and give them child-size tools and access to what they need to do the work. A child-size table and chairs is a great start. A step-stool in the kitchen and bathrooms is another one. Take a look at the picture of our entryway for example; it's nothing fancy but it works great for fostering independence: the bench (it's actually an IKEA shelf we laid on its side...) allows the kids to sit and the cubicles allows free access to shoes which means the kids can pick up their shoes themselves, sit, put their shoes on and we're ready. When we come back, they sit, take their shoes off and slip them back into the cubicles. Magic! The coat rack is also child-friendly (another IKEA purchase!) as it features high AND low hooks. The kids put their jackets on the low hooks themselves and pick up their jackets themselves too! So basically, our kids have been getting themselves ready for a while now (Zahavah is still working on putting her jacket on though). In the background...a "bit" of historical geography (an authentic map of Paris, France as of 1739) and a piece of culture (Cross carved in "Jerusalem Stone" - limestone carried in Israel and used in the building of religious temples).
 |
| 10. Basic Art Supplies and Basic Musical Instruments |
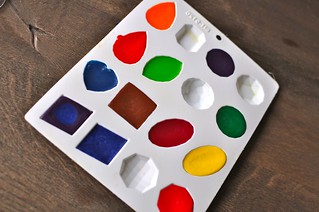
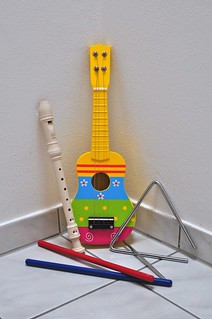
During the "toddler years", basic art supplies and music instruments will be introduced. As such, you should have on hand a small supply of colored pencils, crayons, clay, tempera paint, watercolors, and scissors. An easel would also be a great addition. As far as musical instruments go, it can get expensive, no matter how "basic" they are so if you invest in them, make sure you use them! :) For this year, I intend to get/make (or already have/made) a triangle, rhythm sticks, drums, tambourine, cymbals, rainstick, kazoo, and sandpaper blocks. (Shown above are a triangle, rhythm sticks, a recorder and a ukulele.)
And this, ladies and gentlemen, is my personal Top 10 Essentials for my own personal Montessori Toddler Home School Classroom. These are the 10 things I could not do without (I think I did forget books though, didn't I? *sigh*) What are yours?
Your comments make my day !
(Please note : comments won't be visible until after my approval!)
Today, I'm happily linking up to
Montessori Monday,
The Kids Co-Op,
Show-and-Share Saturday,
Link & Learn,
TGIF,
Share it Saturday,
Mom's Library,
The Sunday Showcase,
Sun Scholars's For the Kids Friday,
Stress-Free Sunday,
Thursday Toddler & Preschool,
Tuesday Tots,
Preschool Corner &5K,
Serenity Saturday,
Monday Kid Corner,
We Made That.
If you would like me to link up with you, please don't hesitate to ask, it might take me a week or two, but I generally do!
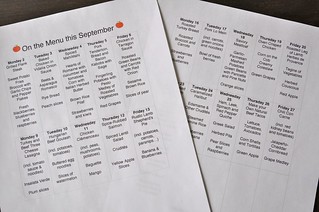
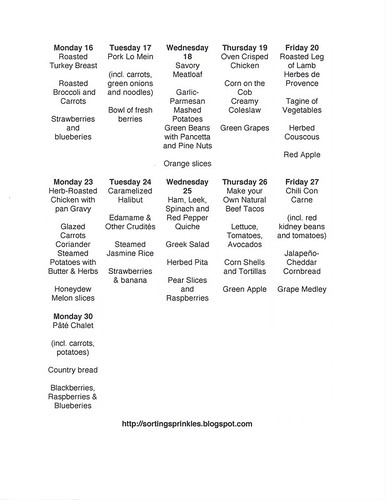
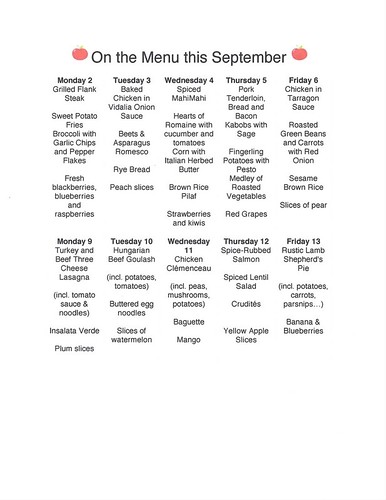 As you've noticed, our meals always include a protein, and two sides of vegetables unless veggies are included in the dish. In the cases where a grain such as pasta or bread is not listed or part of the dish, slices of whole wheat bread are readily available. For drinks, fat-free milk is served. For dessert, as you can see, fresh fruit is what we prepare. Fruit is, by definition, sweet and my kids love their fruit dessert. They do occasionally have a treat of course but they still need to gobble up their fruit first! :)