Shortly after my boy fell in love with dinosaurs, he started associating them with volcanoes. It really seemed like every book he looked at combined them both when trying to illustrate one. Now last year, his focus was really onto the Stegosaurus and Triceratops but this year, it started shifting a bit. Curiosity had grown and he just had to know a little bit more about these mountains of fire standing in Argentinosaurus's background. Of course this unit was entirely unplanned but these can also turn out to be the most fun as we all know. Even younger sister Zahavah, a mere toddler, squealed at the many demonstrations she saw and demanded to take part into most crafts. Here I share with you all today, some of "stuff and fluff" we went through during our study of volcanoes. Enjoy!
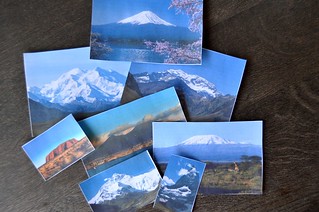
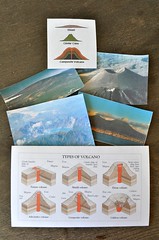
What is a Volcano? After gathering some thoughts, my son's final answer was that volcanoes were mountains shaped like a cone spitting out lava. From then on, we discussed whether some volcanoes sometimes stopped spewing lava and simply looked like mountains. To this he agreed. But were all mountains volcanoes then? My son was pretty sure they weren't. With a set of pictures printed from the Internet, he went on to sort volcanoes from mountains. Mount Kilimanjaro was the only one mistaken for a mountain (who can blame him?). Once this work was finished, I explained that a volcano really is only a crack into the Earth's surface; a crack that allows magma to come through.
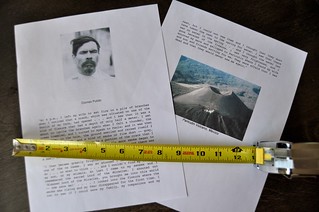
But just how do volcanoes grow? They are born from an opening into the Earth's crust but how fast do they grow and how do they build up from a simple fissure? For this, we read an eyewitness's account of a volcano birth. My son was impressed to hear that someone had seen with their eyes a volcano start from a crack and then went on to grow right then and there. He loved hearing about the smells and noises that came with the birth of Paricutin. Once we finished reading Dioniso Pulido's story, we used a measuring tape to see how much the volcano had grown in front of that man and then, well, the tape wasn't long enough to cover for even the next 24 hours! :)
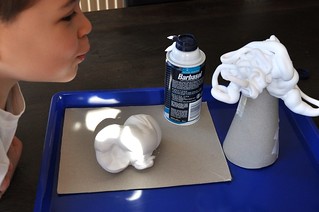
Now that we knew how Paricutin had grown from a crack to a big cinder cone volcano, it was time to learn more as to what exactly made it grow... Per an idea seen on I.Science Mate, I used a cereal cardboard box to pre-make two volcanoes: a well-known stratovolcano and a simple fissure (poked a hole in the cardboard) aka a volcano being born. With some shaving cream, I demonstrated how the magma came to the surface of the Earth through the crack (hole poked, pushing cream through from underneath). As the cream accumulated, our newly born volcano started to grow and to build up. The "lava" was piling up. We did not really enter the details but I did mention the occurrence of lava bombs, ash, tephra and such coming out as well. As for the stratovolcano, well, I chose to demonstrate with that one as well to show that even big volcanoes will keep building up and will only get bigger as they erupt time after time. I also explained the role gas played into the expelling of the magma. After all, volcanoes do stop erupting at some point (well, most of them do at least...)
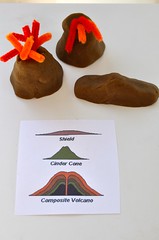
Having looked at different pictures of volcanoes, my son was well aware that not all volcanoes looked alike. It was time to talk about the three main types of volcanoes. We knew how they were born, we knew what made them grow but we did not know why they grew differently. Did it have anything to do with their eruption style? Gas levels? Magma viscosity? Yes indeed! With some logic, we were able to determine that shield volcanoes were gentle "erupters" since they did not have the "traditional cone shape" and that their lava must have been very runny to spread so far and create such long and large volcanoes. On the opposite spectrum, a stratovolcano had to be explosive and shoot up in the air to produce such a cone. The magma also had to be thick and sticky to stay up on the "cone mountain". But what about a cinder cone? An "in betweener"? Sort of. A bit explosive...Actually kind of runny lava. Main difference? Gas levels! Once we sorted it all, the major hands-on fun began: making all three types of volcanoes using play dough and if desired...pipe cleaners for eruptions! Learn more about the three types of volcanoes here and here.
Having looked at different pictures of volcanoes, my son was well aware that not all volcanoes looked alike. It was time to talk about the three main types of volcanoes. We knew how they were born, we knew what made them grow but we did not know why they grew differently. Did it have anything to do with their eruption style? Gas levels? Magma viscosity? Yes indeed! With some logic, we were able to determine that shield volcanoes were gentle "erupters" since they did not have the "traditional cone shape" and that their lava must have been very runny to spread so far and create such long and large volcanoes. On the opposite spectrum, a stratovolcano had to be explosive and shoot up in the air to produce such a cone. The magma also had to be thick and sticky to stay up on the "cone mountain". But what about a cinder cone? An "in betweener"? Sort of. A bit explosive...Actually kind of runny lava. Main difference? Gas levels! Once we sorted it all, the major hands-on fun began: making all three types of volcanoes using play dough and if desired...pipe cleaners for eruptions! Learn more about the three types of volcanoes here and here.
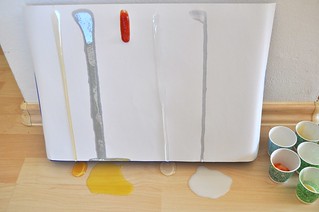
Is mama making a mess? Oh did the kids love this one! All this food making a mess on the floor! It certainly triggered a lot of laughing...and it was all in the name of science. Earlier in the week we had talked about magma being of different thickness and lava traveling at different speeds, thus participating in the creation of various shapes of volcanoes. For this demonstration, I gathered, 5 liquids (all representing lava), a thick sheet of paper (usually for fingerpainting) and a huge plastic tray (usually for fingerpainting as well but I turned it around and taped the sheet to it) which I inclined and put a taped mark on the floor in case it shifted during the demo. One after the other, the substances were poured from the same spot on top of the sheet at about the same speed. Which was the fastest "lava"? Which was the slowest? Was it the one you thought prior to the experiment? Some actual lava is sticky and runny like honey apparently. Wouldn't want to be around that volcano when it erupts but I'd run faster if it were a "milky" eruption!
Substances used (all in the same quantity!):
Honey
Olive Oil
Ketchup
Corn Syrup
Milk
Once more looking at the shapes of our volcanoes, it seemed like shield volcanoes could very well fit the "milk" kind of lava...Spreading kind, the kind that creates islands! :)
 |
| 3D Volcano Craft |
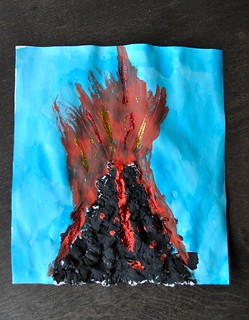
Although it will take you several hours/days to complete this volcano craft (depending on your drying time), it is, as you can see, well worth it. The process is very hands on and enjoyable for children and the product is just as great. Start with a thick sheet of paper or even a cardboard. Have your child draw a basic cone shape volcano or any other volcano shape he/she'd like for that matter. Once that is done, time to cut in 4 pieces several sheets of toilet paper. These will then be scrunched into little balls and dipped into slightly watered-down liquid glue to finally be pressed into the drawn volcano shape. When everything is dry, more of that glue should be painted over the volcano so that later on, the paint can be spread easily. When everything is dry, the sky can be painted (we used watercolors) and finally, the volcano itself (we used dark grey tempera). When all is dry, "lava" can be added using Q-tips and red-orange tempera paint. Let dry again and apply (for fun and extra effect) some red and gold glitter glue. The craft seen above was entirely made by my 5.5 year old. My 3 year old made hers as well and hers was just as nice. She didn't paint the sky entirely (got tired) but thoroughly loved every minute of the volcano craft creation. Original idea: Our Worldwide Classroom.
 |
| Are Volcano Eruptions a Good Thing or Not? |
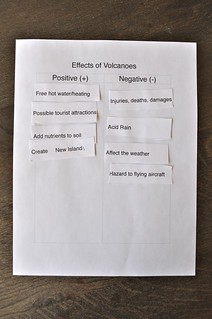
Needless to say to a child who loves volcanoes, volcanoes are spectacular! Of course, Adrian being 5, he also knows that volcanoes come with their share of problems. The goal of this activity was for Adrian to sort through 8 effects of volcanoes and decide whether it was a positive or negative effect. Not problems with the sorting whatsoever, even if some were more obvious than others.
 |
| Parts of a Volcano - 3 part cards |
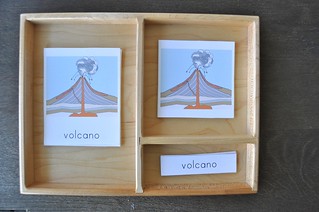
Haven't done 3 part cards in a while it seems. Couldn't resist this freebie from The Helpful Garden though. It helped reinforced the concept of volcano vent, crater, magma chamber and other terms we used during the unit so I was happy when I found them! :)
Looking for more volcano activities? Of course you are! Part 2 of this volcano unit should be published soon! :)
* * *
Enjoying What You're Reading?
Follow Sorting Sprinkles on Facebook or Sign Up to be Notified When New Posts Are Out!
* * *
This week, I'm happily linking up to
This is fantastic! I love the way you guided his discovery.
ReplyDeleteThat is what I am here for. Children learn so much better when they find out by themselves and go from point A to point B by exploring rather than by being told or taken there. We have the time to do this so we take it! :)
Delete