Pages

Wednesday, February 27, 2013

Knights, castles and dragons for Preschoolers - Part 2

Living in Europe does have its advantages when it comes to teaching a child about medieval times. If Adrian were any older, he'd probably be delighted by the jousting tournaments Germany offers (yes, they are back!), the history found in various museums and be surprised to hear that the plague completely wiped the human race from the area we currently live in. For now, he simply enjoys the festival with the "costumes" and the beautiful castles.

Hohenschwangau Castle, DE
Hohenschwangau Castle, Germany - A Medieval Castle we visited last fall


DSC_0893
Building a wood castle for our knight

Most families have wooden blocks of some kind. We were gifted these beautiful natural wood blocks made by Melissa & Doug one or two years ago. They do not get that much playtime but if I bring them out along with ideas, then they do. The task that day was to build a castle for a knight and a "cave" for a dragon. Adrian quite enjoyed having our Fisher-Price plastic knight visit the wooden castle after.
DSC_0873
Counting & Poking Swords

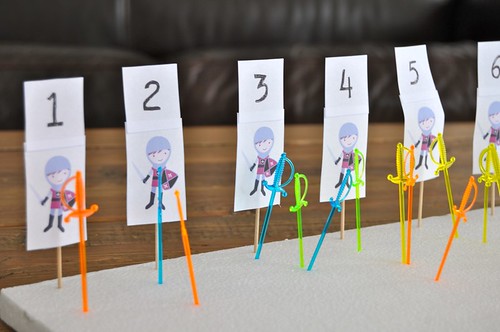
Jolanthe, at Homeschool Creations, makes beautiful FREE preschool packs I use once in a while. I don't like worksheets per se but I'll use bits here and there. The numbers and knight cards you see above were part of her Knights package. I taped the numbers and knights together and taped them to a toothpick I then inserted into a styrofoam board. I also put plastic sword toothpicks into a bowl and let Adrian poke them in a row in front of each number. They represented, I said, the quantity of swords the knights needed in their castle.

DSC_0892
A knight in shining armor - Tin foil knight craft

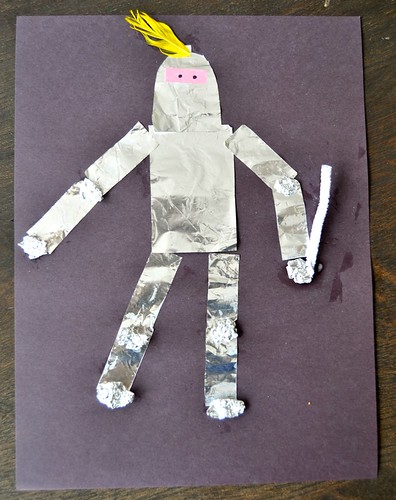
This picture does not make it justice but it truly was a nice craft to make for a preschooler. I personally pre-cut the shapes since foil is so easily torn but I let Adrian crumple the foil for the feet, hands, knees and elbows. He's also the one who glued all the parts in place, including the sword (pipe cleaner), feather and eyes (pink construction paper with two black dots). Wanna make one as well? Check out the template at Busy Bee Crafts! That is where we got ours and where the idea for the craft came from. By the way, Busy Bee Crafts has a few more medieval crafts your kids might enjoy. We thought about building our own catapult for the activity listed next but in the end, ran out of time and used the one we already had...

DSC_0964
Catapult testing - how far, how high, and adjusting to reach targets

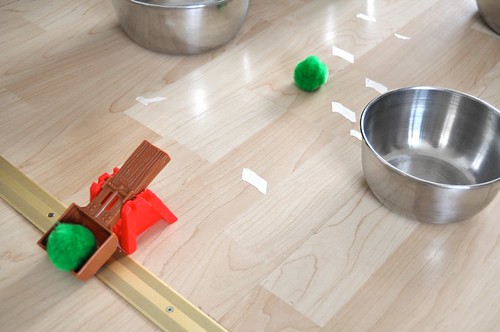
I pretty much knew this would be well loved.  I did not want it to be simple catapulting though. I did want to involve more physics and understanding of how catapults were used back in the Middles Ages. Our first test involved calculating the distance our pompoms were going and how to make it go far and how to keep it close (see masking tape pieced on the grounds?). Then we tried to make it go high and then tried to keep it low. Finally, I asked Adrian if he could figure out how to hit our targets (the mixing bowls on the grounds). It didn't take him long to figure out the catapult should be aligned  with the targets to be effective! Now we own a catapult thanks to a Fisher-Price Little People Play 'N Go Castle set but I initially intended to build a catapult with Adrian following the instructions given on Busy Bee Crafts. See link above.

DSC_0905
Making a "medieval" stained glass window

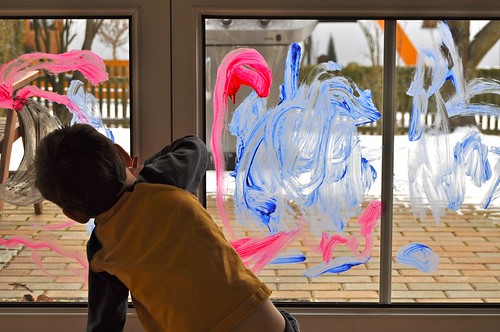
Stained glass became quite popular during the Middle Ages and I thought it would be kind of fun to do a "kid" version of stained glass. That usually means using "contact" paper or waxed paper but we had just done that for Valentine's Day so I decided to let Adrian paint the windows. Yep. I wasn't sure I wasn't gonna regret my decision but I had read that writing on a vertical surface might help his pencil grip so the incentive was there. Turns out, Adrian LOVED painting the windows.  He wasn't sure he should at first and hesitated knowing I'd normally say this wasn't allowed. I made sure I explained this was a one-time thing. We used liquid washable tempera paint mixed with dish soap. Once it was dried, I washed it off with water and had no trouble getting it off at all. I encouraged Adrian to draw but he really just wanted to paint and spread colors all over.

DSC_0920
Sponge-printed castle - Art & Fine Motor

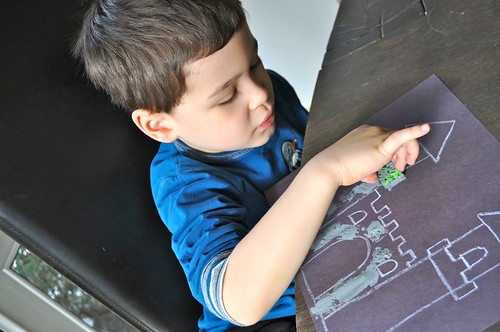
Fine motor skills and art? Absolutely. Other than a good pencil grasp, there is also the tiny sponges that can get involved! Today I cut a tiny sponge from a much bigger kitchen sponge for Adrian to use on this white crayon castle (pre-drawn by...me! No laughing!). The idea was to make "brick prints". Of course, with a preschooler, bricks might not look so much like bricks because they like to dip their sponges into A LOT of paint but if you can convince your child to dip lightly and to print often instead of dipping every time, you may have beautiful bricks on your castle, especially if they are spaced instead of all stacked on top of one another. I tend to emphasize the process over the product with my kids so to me, Adrian's castle was great. I love that he finished it (not a small task with a tiny sponge and that he printed instead of smeared the paper like he could have). The idea for this castle was adapted from  Deep Space Sparkle who did the project with older kids and included more steps.

Monday, February 25, 2013

Knights, Castles and Dragons for Preschoolers - Part 1

Dragons? Yes, I hesitated grandly before coming up with a mini-unit that would include a fantasy component. After all, Dr. Montessori was not exactly known to make room for these. Part of me understands why but part of me also thinks it's sad. I find fairy tales somewhat traditional and feel like my son should at least be aware of what a dragon is. Now that he is nearing 5 years old, I feel like he is well grounded in reality and that he knows certain creatures were made up by someone else's imagination. Sure he can create his own "monsters" and most certainly the real world is big enough for a 4.5 year old to discover but I still liked the idea of incorporating a tiny bit of dragon into this thematic. Hey, doesn't the Komodo Dragon exist after all? ;)


DSC_0930
Making old pennies can shine like new

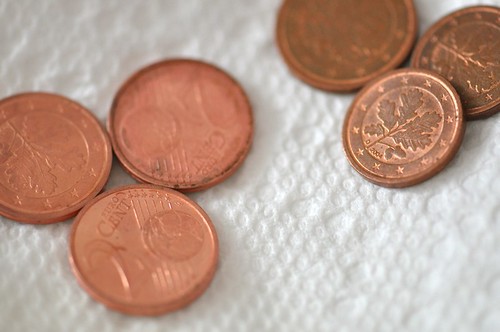
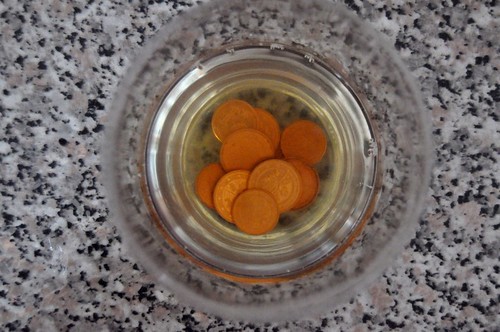
The background story given to Adrian was that a knight wanted his shining armor to be shiny again but before handing it to us, he wanted to make sure we could make it shine. As such, we would practice on cents. Being that we are in the E.U., we used Euros but American and Canadians pennies (did you guys keep some?) will work as well and other high content copper coins from other countries would as well. You'll need some salt and vinegar. I was out of regular vinegar so I used apple-cider vinegar (thus the yellowish color in the glass) and it worked just fine. The pennies don't need to soak long at all and Adrian liked to dip for 5 seconds and check the line the solution had made on the penny before sending the coin to the bottom of the glass. For full instructions, check out the link under the 2 pictures.

DSC_0936
Can you guess which cents were cleaned and which weren't?

DSC_0951
Can you guess which cents were rinsed and which weren't?

Ok. So the rinsed cents did not leave any residue on the paper towel and the ones that were no rinsed sadly didn't leave much behind either. It just remained on the coins themselves...which is still cool since the cents were quite colorful when we flipped them over. Adrian thought the rinsing versus non-rinsing changed nothing at first but when he turned the coins over, THERE was a different after all! 

Instructions and extensions to this activity can be found on Exploratorium's Website


DSC_0888
"Metal" working - Hammering textures in aluminum foil


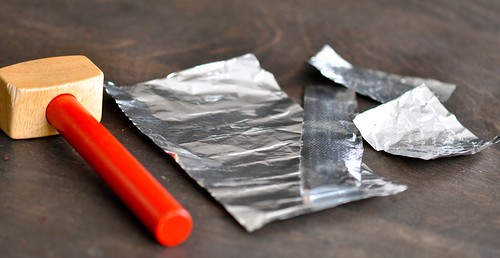
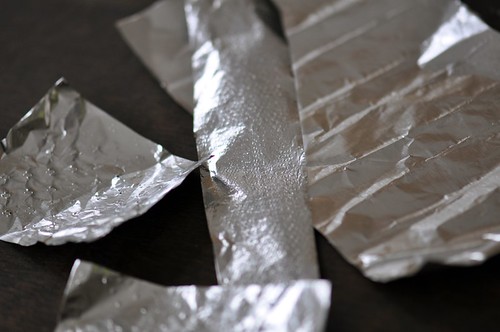
Is texture rubbing popular in your house? We haven't done it here except with leaves but I thought we could do something similar with aluminum foil and a toy hammer and pretend we were working metal like in the Middle Ages. It was actually not very easy to find textures that would hammer well. We either have a very smooth home or hammering textures is much harder than rubbing them with crayons. The activity itself was still fun but I felt like I was looking for textures more than Adrian was.

DSC_0878
Close-up of our results


DSC_0955
"Castle and Sun" by Paul Klee

Being that we were doing a unit about the Middle Ages, I thought I'd sneak in our first Artist. About time, right? We've been doing art a lot but not appreciating it much. I am now aiming to do it once a month. For this month, I picked Paul Klee and his "Castle and Sun" painting. Adrian and I first looked at Klee's work through a slideshow at Wikipaintings.org. We discussed how he liked to use shapes and looked at the colors he liked. We talked about Klee himself and how he lived in Germany like we do. I then showed Adrian the "Castle and Sun" painting. I had printed that one. I made sure not to mention the name of the painting to Adrian and then asked him to tell me what he thought it was about. We talked about the shapes Klee used, the colors, the sizes, how he filled the frame of the picture and so on. In the end, I presented a black sheet and tray filled with pre-cut shapes. Adrian was then asked to make his own "Castle and Sun". I first saw this idea of My Montessori Journey. I saw it done with chalk too and the results are always beautiful.


DSC_0914
Crown Jewels - Counting Gems

A little counting activity I saw on Our Montessori Home. Really easy and basic for Adrian but I didn't have enough gems to make it more challenging. The size of certain jewels made it difficult though! :) Off to buy more gems! :)


DSC_0897
"Pin" pushing / "Slaying the Dragon"

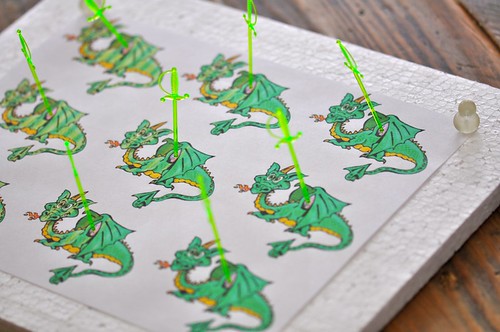
Hmm. I didn't tell Adrian we'd be slaying the dragon actually. It sounded too violent to me so I actually told him we'd pierce the dragon's heart with a sword to turn him into a nice dragon because there was a "nice dragon" serum on the tip of the sword. :) He made sure not to miss and inserted the tip of the sword into the heart of every dragon. I found this clipart on Best Clipart Blog and the sword toothpicks at a dollar store back in the U.S.


DSC_0917
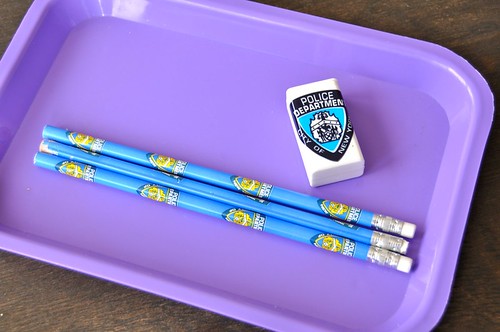
Sharpening Jousting Lances...aka pencils

Well this was the first time Adrian sharpened a pencil. I quickly realized that 3 was way too many! :) 1 was enough and it took a while and lots of encouragement. I found it was a GREAT hand strengthening exercise though. Will have to do it again. I pretended these pencils were jousting lances in need of sharpening for the jousting tournament. Cute, eh?

Stay tuned for another post on knights, castles and dragons later this week!

* * *

Montessori MondayThe Weekly Kids Co-Op at B-Inspired MamaI Can Teach My Childparents as teachers

Thursday, February 21, 2013

Valentine's Day for Preschoolers - Part 3

And here are the last activities the Valentine's Day Week brought us. Thankfully, there were no complaints that it was too pink or girly that week. :)

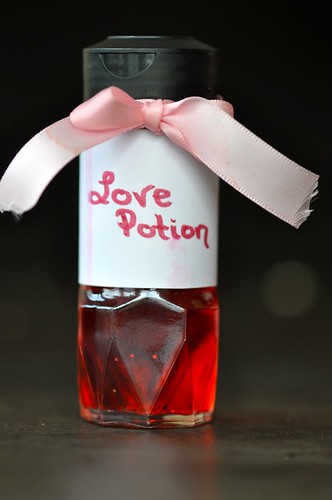
Valentine's Day Love Potion
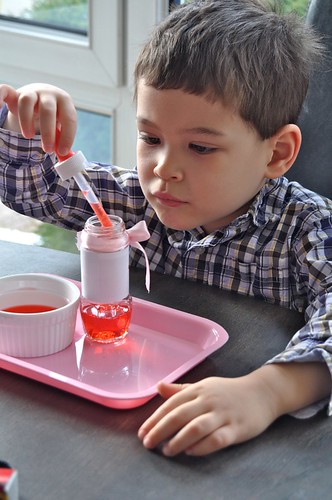
Love Potion - Filling with an eye dropper

"Oh why not?", I thought. Kids love potions, right? Adrian colored the water red himself by squeezing a few drops of food coloring and then proceeded to squeeze the eye dropper until all the water from the bowl had been transferred to the potion bottle. I initially had fancied a test tube but as usual, could not find the desired object in time for the activity (ugh!) No biggie as I had no stand for my tubes anyway. After the red water transfer, Adrian was invited to sprinkle some glitter and a drop of perfume from a tiny sample tube I was given at a store. 

Eye dropping Love Potion
Adrian preparing the love potion...with love!

Roses in the holes
Arranging a bouquet of roses - inserting roses into punched holes

This one is more of a toddler activity I guess but I thought it may still be a tad bit challenging for Adrian considering these silk roses have thorns (making insertion more difficult). On top of that, the stems are so long that Adrian had to take care where he was putting the roses as the short vase (a cottage cheese container) might topple over. So basically, the vase had to be held tightly as Adrian chose carefully where the next flower would go so as to not upset the arrangement. In the end, it was a success!


Make a Valentine - tissue paper
Making a Valentine

Now it may not look like much but making this Valentine took quite a bit of fine motor effort. Adrian had to crumple all the pink strips of tissue paper I had prepared and then he had to dip them in the liquid glue and press them inside the pre-drawn heart I had crayoned on the card. I guess we lost of bit of the shape as we went along but it's probably because I didn't make my heart "deep" enough.

Pink Tower Extension 0
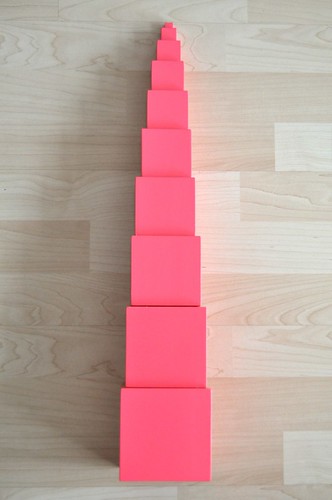
Pink Tower and extensions

One of the first materials I purchased after deciding to homeschool my then 3 year old Adrian was the Pink Tower. It seemed like it was a symbol of the Montessori education; a must-have in our home. Fast-forward a year and a half later and the Pink Tower has not been touched much. Let's just say so far, I haven't gotten my money out of it! :) Being that it's Valentine's Day and that Valentine's Day is usually associated with red AND pink, I figured I would  dust it off and try to make it worth my investment... I'll be honest, Adrian tried hard but had very limited success in making these pink tower extensions. We'll try it again but with less blocks next time and when he is not sick. I proceeded to show him the pattern to reproduce with my own pink tower (pink construction paper cut the same size as the blocks of the pink tower) and asked him to make his next to mine but in the end, he had to do it on top of mine...


Pink Tower Extension 3
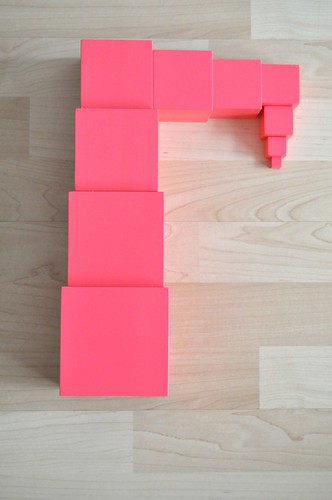
The "crane" extension

Pink Tower Extension 2
The "diamond" extension

Pink Tower Extension 1
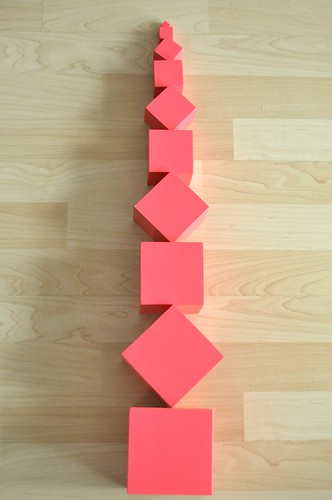
The "diamonds and squares" extension


Pink Tower Extension 4
The "shelf" extension

Many more extensions of the Pink Tower are possible. These are just a few we tried. Eventually, I'd love to get the brown stairs and make even more designs. Adrian is just not into "blocks" so I'm not sure it's worth buying but we'll see...

Wednesday, February 20, 2013

Valentine's Day for Preschoolers - Part 2

Valentine's Day has come and gone and you're probably already preparing your St.Patrick's Day trays but I'm more of a last minute-type of person. Always have been. It always gets done but I work better under pressure when it comes to "curriculum". Anyhow, here are a few more "V" Day activities we enjoyed last week...

Valentine's Day Suncatcher
Craft / Fine Motor - Make a Valentine's Day Sun-catcher

I've seen the sun-catcher done with "contact paper" a lot. Unfortunately, I didn't find my sheets until after we had completed our craft. This is always the way it goes here. (Note to self: I really need to get around these school boxes and organize them better). Anyhow, this sun-catcher was made with a sheet of wax paper, pink and red tissue paper, glue and red construction paper. I personally pre-cut the heart made of wax paper and heart made of construction paper. I glued them together. All that was left was for Adrian to tear the tissue paper (fine motor) and paint some glue on the wax paper heart and then put the tissue paper on top of the glue he had just spread on the wax heart. Voila! A nice Valentine's Day decoration. He was so proud to decorate the window and his sister loved seeing "Adrian's heart" everyday.


Valentine's Day Snack Strawberries
Preparing a Valentine's Day Snack

Well, these don't look as pretty as my regular "tuxedo" chocolate covered strawberries but I had to make this activity preschooler friendly...As such, Adrian washed the strawberries, dried them, poured the chocolate chips into a bowl, helped with the microwave and the stirring of the melting chips and finally, coated all this red fruit with the melted chocolate. He then laid the strawberries on a waxed sheet of paper until dried (unless he decided to roll some into mini chocolate chips or sprinkles prior to drying).  When little Zahavah woke up, Adrian was very proud to carry out his tray of strawberries. I allowed him to choose two, and to give two to Z and of course I put the rest away. When his daddy came home on Valentine's Day, he was glad to offer him his freshly made treats.


Tweezing hearts into heart mold
Tweezing Candy Hearts into Heart Shaped Ice Tray

Using small candy hearts and toast tongs, Adrian had to tweeze the right amount of hearts into the right compartment. That's right. Under these candies is a number ranging from 2 to 8. Adrian had to tweeze AND count. Tweezing has become a bit easier so to add to the challenge, I decided to add counting. It definitely made things more interesting.


Mending Broken Hearts Counting
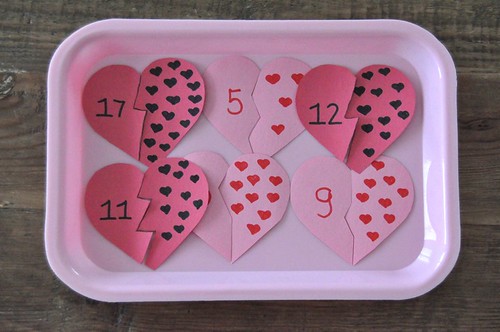
Mending Broken Hearts - A counting-puzzle Activity

Sherine at Trial and Error Mama had a broken heart activity like this (I first saw it first on Living Montessori Now) and I thought it was purely adorable so I made one as well. I wish I had had access to cuter craft materials to make it more presentable but it still served the purpose and Adrian still liked it.

Descriptive Hearts
Describing Textured Hearts - Enrichment of Vocabulary

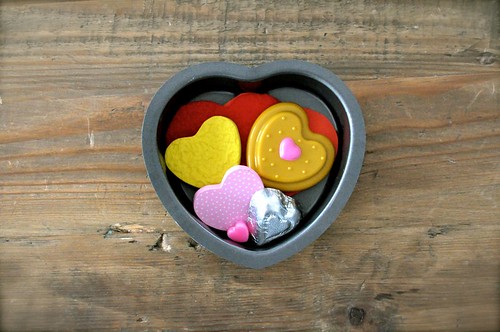
I've been trying to get my boy talking lately. He's a little man of very few words, especially when describing so I put out this heart-shaped pan filled with hearts made of different materials. I then asked him to describe each heart with two words. At first, it was impossible difficult. He could not find much to say at all and I had to prompt him but towards the end, it was more natural. I was simply looking for adjective complimenting the size, color, texture, material of the heart. 

Hearts included:

Home-cut Foam heart
Home-cut Felt heart
Crepe Paper Hear (from Lauri Toddler Tote puzzle)
Wooden Heart (from Melissa & Doug Sweet Tower)
Plastic Heart (from Fisher-Price Tea Set)
Candy Heart
Foil Wrapped Chocolate Heart

Dare you add an ice shaped heart? I did not! :) But I sure thought about it! :)

This post was shared at Montessori Monday, Tuesday Tots, Mom's Library, We Made That Wednesdaythe Weekly's Kids CoopShow-and-Share SaturdaySunday Showcase, Link & LearnShare it Saturday and Preschool &Kindergarten Community..

Tuesday, February 19, 2013

Valentine's Day for Preschoolers - Part 1

How was your Valentine's Day? Is it even celebrated in your part of the world? I know American and Canadian stores always have beautiful pink and red display of roses, boxes of chocolates and cuddly teddy bears on their shelf but in Europe, it is not so much the case; at least not over here in Germany. Valentine's Day is "observed" but not "commercial". As such, finding little trinkets for school was quite difficult. I would usually head over to a "dollar store" to pick up small items to count, sort and tweeze but no such luck this year. *sigh* Anyhow, here's a look at what we did this year in our Valentine's Day Unit...


Revealing hearts watercolor
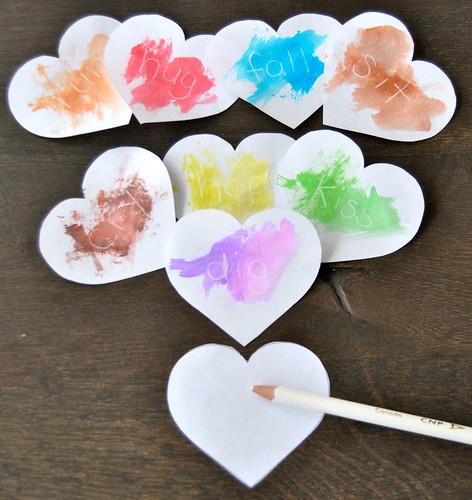
Revealing Hearts & Watercolors

If you haven't tried anything like this before, you totally should. Adrian LOVED making words appear with watercolors. I shaped these papers like hearts for Valentine's Day but it could be done for any time of year of course. First, write down with a white pencil a word on a white paper and then bring out your watercolors (We used Crayola's Washable watercolors). While being painted, the word will "magically" start appearing. After it had appeared, Id' asked Adrian to read it and act it out. He was  able to read about half the words and I helped him read the other half. Overall, a big hit. Original idea to b credited to BHG.

Valentine's Day Bingo Cards
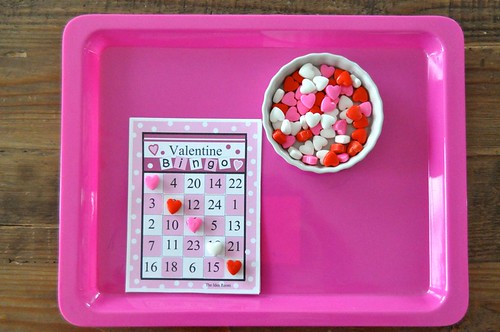
Valentine's Day Number 1-30 Bingo

Who doesn't like Bingo? And how cute is this tray? I found these pre-made cards on The Idea Room. You can also customize the cards by printing blank ones if you need higher numbers or letters. For chips, we used some Valentine's Day candies I found at the grocery store.

Valentine's Day Playdough chocolates
Making Chocolate Truffles with Playdough

You have no idea how fast I ate those so I could have an empty box of Valentine's Day chocolates for this activity! :) I just love to have Adrian do playdough activities and couldn't resist this one. Adrian still has trouble (lack of motivation?) making playdough balls but I thought this empty box of chocolate and chocolate colored and smelling dough might make it fun (Tutti Frutti brand makes lots of GREAT smelling dough...vanilla, strawberry, chocolate, etc.). Unfortunately, it didn't. These perfect little truffles were all made by me. :( Ugh...

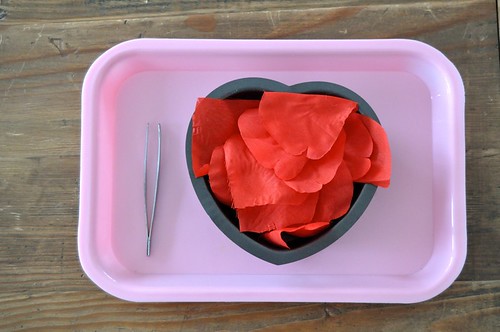
Tweezing Rose petals
Tweezing Fake Rose Petals

I once bought a small bag of fake rose petals to take pictures of a tiny little baby Adrian. Remembering I had that bag, I pulled it out and poured 20 petals in a heart-shaped baking pan. With a pair of tweezer, Adrian was all set to tweeze the rose petals into another bowl (not pictured).

Lacing Valentine's Day Heart
Lacing a Heart

Lacing is always a popular activity here. This time I asked Adrian to lace over instead of over and under. We also used a ribbon instead of a shoelace. 

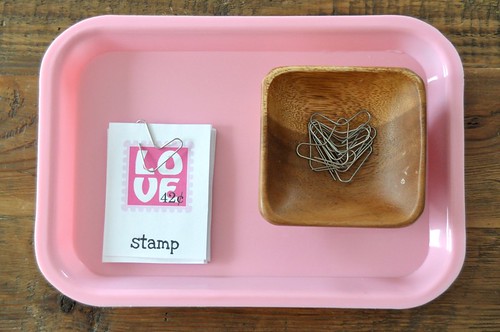
Heart Paperclips & matching Valentine's Day Cards
Matching Cards + Using Heart Paperclips

Remember making heart shaped paperclips from regular paperclips? I somehow remembered doing that while brainstorming about Valentine's Day and decided to have Adrian paperclip matching cards with heart shaped paperclips. (Now if I could only have found red ones!) It was a bit more difficult finding the opening but at the same time, the opening is wider making it easier to insert the pair of cards. The cards were printed from a pack made by Jolanthe at Homeschool Creations.
* * *

Adrian - Valentine's Day Baby

Monday, February 18, 2013

Mardi Gras for Preschoolers

I sadly have a tendency to make my posts about what we did LAST week which means this week, I'll be posting about our Mardi Gras activities and Valentine's Day activities...It probably won't be very useful to you this year but you'll know where to look next year AND there's always some trays that can be adapted for other occasions of course (a change of colors might just do it for example!)

Now, back to our Fleur de Lys...Being that I am from Quebec and a full-on French-blooded creature, Mardi Gras is something I grew up with but not in the terms of Bourbon street. Mardi Gras is more of a "Carnaval" for us and unless you go to Quebec City, you might not really remember it is Mardi Gras, nor see the floats. You might get a King Cake, complete with a bean inside though but that would be mostly thanks to your good mom (hi, mom!), not your local baker.

Mardi Gras Float - Mobile, Ala.
Mardi Gras Float, Mobile, Alabama, 2005. Lots of fun for all ages!

When I finally moved to the U.S., I finally got to enjoy the "original" Mardi Gras in Mobile, Alabama. What an experience that was. Completely different from a snowy, freezing Quebec Carnaval. :) Probably quite different from a New Orleans Mardi Gras too. Mobile was quite family friendly. Fast-forward to a few years later and we experienced a Fastelavn in Denmark, a Fasching in Germany and who knows? Maybe a Venetian Carnival if we ever get the guts to go with the kids. For now, I bought a mask and called it  a day. But enough of my rambling, let's get to the point...The Mardi Gras trays...

Lacing Mardi Gras Beads
Lace your own Mardi Gras Bead Necklace

If you own Melissa & Doug's Primary Lacing Beads, this activity will be very easy to prepare. I used the "gold, green and purple" Mardi Gras colored beads and the green shoelace provided. Voila! 


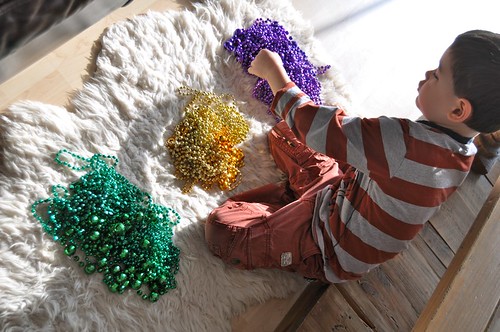
Sorting Mardi Gras Beads
Sorting Mardi Gras Bead Necklaces by Color

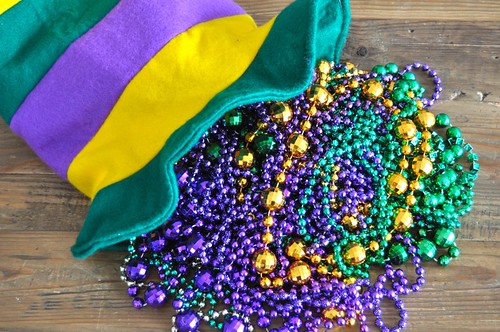
Another very easy activity to prepare is one adored by my kids aged 4.5 and 2; playing with bead necklaces. I provided all my gold, purple and green bead necklaces and asked Adrian the sort them. It looks easy but as they get tangled, it is not as easy as it looks. Once sorted, the extensions are endless. I list below, a few ideas. I personally never purchased any bead necklaces and have many more colors. If you live close to New Orleans or Mobile, you'll know where and when to get "free beads" too. I got all of mine by attending the Mardi Gras float parades of Mobile, Alabama in 2005 and a few by going to a Halloween event in New Orleans back in 2004. Do not believe everything you hear: attending these events if enough to get "beads". Enough said. If you are too far, Oriental Trading Company does sell necklace beads as well.


Sorting Mardi Gras Beads by Color
"Beads" Now Sorted: let the counting, sizing and measuring begin!

Once the necklaces are sorted, the "real" fun can begin. We counted how many green, gold and purple necklaces we had by putting them around Adrian's neck, discussed the size of the beads, the shape (some were dice beads, some disco balls, some were eggs, etc), the length of the necklace (one purple necklace almost touched the floor when he put it on!), the overall weight of all these necklaces around his neck and so on.


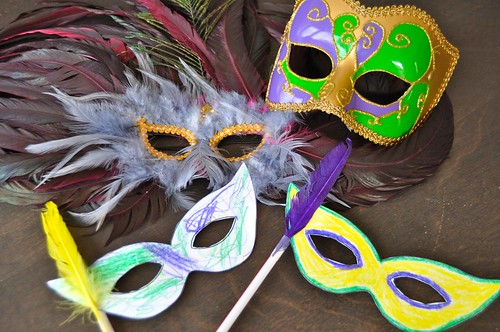
Mardi Gras Mask Preschool
Make a Mardi Gras Mask

After I brought out my old Mardi Gras masks, Adrian had to try them on. So I let him and pointed out some of their features. I also showed him other masks including our Venetian mask (it's hung on a wall). Finally, we created our own masks. Nothing fancy. Our art supplies are getting depleted and Adrian is not too artsy but usually bases his designs on mine so I made a mask too. My templates were ready and the crayons were out along with feathers and a drinking straw and tape. See the results above! :)

Mardi Gras Beads Shapes
Mardi Gras Necklace Shapes

Using Mardi Gras necklaces, make various shapes. I started with the circle and moved on with the oval, rectangle, square and triangle. We eventually played around and tried making some letters. It was difficult (boring?) for Adrian. He made a pretty good oval but couldn't quite do (had no interest?) any other shape.  I originally saw this idea on E is for Explore.

* * *

Happy Mardi Gras!


* * *

Your comments make my day ! 
(...but won't be visible until after approval due to increased spam...)


* * *

This week, I'm happily linking up to

Wednesday, February 13, 2013

In the Kitchen for Preschoolers - Part 3

Our "kitchen" theme is now coming to its end. What a broad topic this was! We never even got to talk about nutrition! Fear not...school year is not over and I shall be back! LOL


tasting bottles
Tasting Bottles

Raise your hand if you remember doing some tasting bottles at some point in your life! How did you like it? Well, Adrian loves seeing these little bottles. He loves science and associates these droppers and small bottles with experiments. Of course, after tasting the first bottle, he wasn't so sure he liked the bottles anymore but he stuck with the activity. I was almost surprised but very proud. 

Here's what each bottle contained:
2 x sugar water (sweet)
2 x salt water (salty)
2 x lemon juice (sour)
2 x almond extract (bitter)

Matching the bottles wasn't fun for him since he had to taste everything "over again" but he still pushed through it. He really liked the sweet and really disliked the bitter. If you do not have almond extract, unsweetened cocoa or coffee can be used in place of almond extract.


pasta necklace
Lacing Pasta / Making a Pasta Necklace

Although you could dye your pasta for this, I chose to go with natural pasta (penne) for this activity. I put a dozen one along with a pipe cleaner. Adrian then laced them all. It's one of the only time he lets pasta get this close to his mouth! haha 

measuring pouring liquids
Measuring/Pouring Wet Ingredients / Preparing a Snack

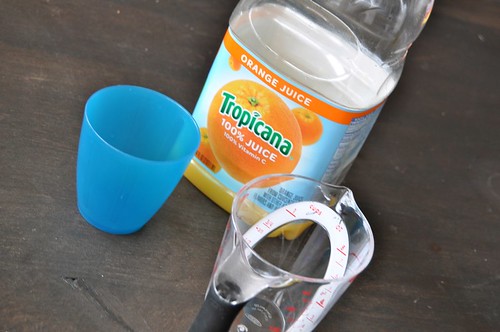
Adrian's regular cup. A measuring cup. About a cup of orange juice in an orange juice container. Adrian's mission: Measure half a cup from the container in the measuring cup, then pour it in the snack cup. Enjoy! :)


straw blowing art
Straw blowing Art

Straws belong in the kitchen so I thought it'd be a good time to bring out thinned out paint and straws for a "blow out"! I did that as a kid in Kindergarten with ink and I still remember it. I had absolutely loved it. Adrian didn't quite care for it. In fact, he doesn't quite care for the arts period. Well, not true. I take that back. He does enjoy looking at it; not making it. Anyhow, I thinned out the paint the consistency of fat-free milk,  put a drop on the paper, he'd put his straw in the puddle and blow. He didn't quite find it exciting...*sigh* :)


matching front back boxes
Matching front and back of boxes

This is a bit elementary. Adrian had no trouble whatsoever matching the front to the back of the boxes I had cut up. I believe there was a dozen on the tray. Of course, he knew most of them (yes...he is the one eating the "FiberOne" cereal, "Wheaties" and "Kashi 7Grain" crackers) so that may be why it was easy peasy. It was still fun though and different. Novel is always pleasant.


This concludes our "In the Kitchen" Unit. I feel like lots of possible activities were left out but isn't that always the case? For example, I had planned on doing smelling bottles but had to back out at the last minute for a lack of matching bottles to present the activity. That being said, I am now collecting spice bottles (did I really throw them all away when we moved last year?) and planning on introducing the smelling jars at a later time...:)